#base mesh
Explore tagged Tumblr posts
Visit Tumblr Blog
Explore Tumblr blogs with no restrictions, modern design and the best experience.
Last Seen Tumblr Blogs


Fun Fact
Kazakhstan’s Minister of Communications and Informatics has blocked the Tumblr site because it contained 60 sites of terrorism, extremism, and pornography in 2015.
Text
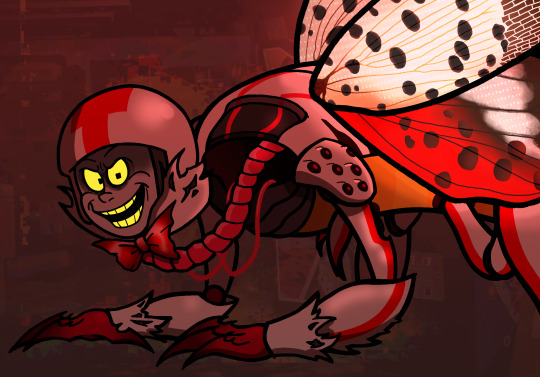
Turbug
#i was trying to mesh king candys cybug design with the more turbo-centric concept art for his cybug form#hes based off of spotted lanternflies because they're highly invasive just like him ; )#my art#turbo#turbotastic#turbo wreck it ralph#king candybug#king cybug#i guess??#cybug turbo#turbug#wreck it ralph#wir
485 notes
·
View notes
Text
so you know how zeff says to sanji “you can walk right back into the ocean for all i care” after sanji threatens to walk? yeah i think about that line a lot and specifically the way zeff says back. he doesn’t just say sanji can walk into the ocean, he says he can walk back into the ocean. it’s such a simple distinction but it holds so much meaning because, for all intents and purposes, sanji came from the ocean, from that storm and that rock. that single word signifies that whatever happened before, whatever sanjis life was before, doesn’t matter to zeff and it never will because well, why would it? zeff doesn’t give a damn about his past, for all he cares this kid and responsibility for him was chucked at him by the waves of that storm 9 years ago and that was that. and as for sanji? yeah it’s even more meaningful. in his own words: “13 years ago, vinsmoke sanji escaped the kingdom of germa and died at sea”. vinsmoke sanji died and the person he is now, the one who was shaped by zeffs guidance was born. the sanji we see really did come from the ocean, from a random part of the east blue that carried the ship that took him away from germa. it was because of that ocean and that ship that he was able to live the life he deserved and be the man he was supposed to be.
#sanji and zeff fuck me UP#i love when adopted father/son relationships#side note sanji was definitely the kind who threatened to kill himself all the time when he was 14#just based on his immediate ‘i WILL quit don’t test me’#one piece#one piece live action#black leg sanji#one piece sanji#opla#vinsmoke sanji#red leg zeff#no one can stop me meshing anime and opla together#shout out to reiju as well love her and everything she did for him
694 notes
·
View notes
Text
To be loved is to be changed


#cricket doodles#my art#deltarune#seam#seam deltarune#deltarune seam#Based on their light world self. They drive me crazyaayayay#Genuinely I think about that line from the newsletter abt their tail a lot. Torn off by cruel loving hands.....#What else have they lost.........#There were gonna be a couple more shots of them sitting in the unused classroom but all of my tries didn't mesh with the rest of the comic#So here they sit on display in their lonesome#utdr
185 notes
·
View notes
Text
it's pretty different to the way i've seen people usually depict him, but personally i don't really imagine signless as all that similar to kankri, or as just a general regular jesus guy
whenever i think about his personality i always think of him as more of a mix of karkat and wayward vagabound, because if you really think about it wv is the closest character in homestuck to him. i think people are really missing out by not thinking about the mayor and signless parallels
he's known for wearing robes. he starts out typing in all caps. he's rude and prickly at first. he's scrappy because he's had to learn how to survive in a harsh environment. he's deeply traumatized
he's a rebel, a lowly pawn, who rises up and inspires a rebellion that brings people together. no more hierarchies, no more derse versus prospit, no more kings and queens. and the flag he waves when he does is bright red
but then it fails.
to me, other than personal details, the biggest difference is wv survives
#wayward vagabound#signless#the other stuff is fun#and hes based on jesus so the jesus personality type makes sense#but i think a lot about how weirdly similar him and the mayor are#and even though kankri exists and all i still really see the signless as karkats guy tbh#since its his history#so i usually imagine him similar to him in a lot of ways#though more grown up and mature#which i feel like meshes pretty good with the wv stuff
108 notes
·
View notes
Text
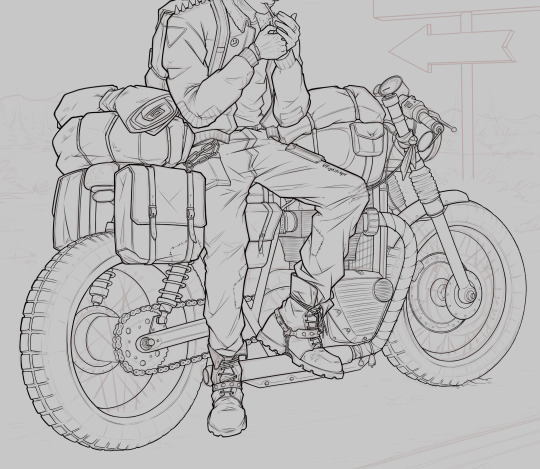
Lines galore. About 18 hours worth RIP.
#wip#my art#last WIP for this piece before i finish it i promise#i just really like how the lines are turning out#and it's taking me fucking ages#like half the bike was lined from memory with no reference because i love to suffer#'from memory' meaning with my own bike in mind meshed together with the bike this is actually roughly based on#so uh#accuracy may vary
140 notes
·
View notes
Text
Watching some random game's gameplay on yt and
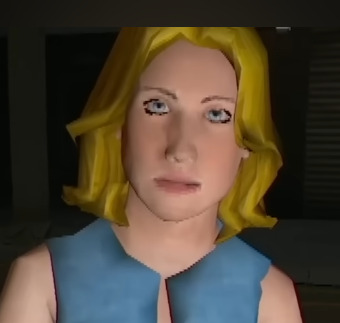
Idk i have a ✨️feeling✨️ this game dev did not mesh this hair lmao
#this is a very small horror game from a very small dev and it's no shade to them#but this is HILARIOUS#i bet he didn't think people would notice. unfortunately I've looked at those meshes way too many times already to recognize them anywhere#and this one isn't even straight from the game. im pretty sure this is cc lmao#the game is filled with those. i think i saw 1 character with a hair mesh i couldn't recognize l#there are also a bunch of accs like glasses from the base game and a male top#I've stopped paying attention to the history and am now looking for the sims 3 meshes with heavy decimate#sims 4 meshes***#nonsims#non sims#is it nonsims tho
71 notes
·
View notes
Text

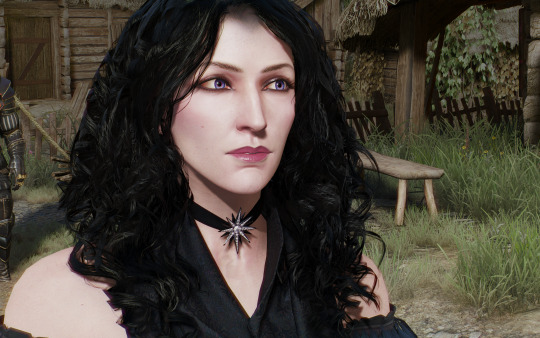

#the witcher 3#my mods#yennefer or vengerberg#base mesh is fine enough#I sold my soul for good weights#she even behaves alright#time to texture
77 notes
·
View notes
Text
Having OSDD and playing STP and seeing how other people interpret the voices is crazy. Mostly because I attribute all the Voices as just being smaller parts of the Whole (You, the player) so it’s harder to take their flaws seriously when it’s like. Yeah but I’m not like that and I don’t wanna do that, ur just a thought bro.
Like L + Ratio imagine not being the guy in control of the body today, ANYWAYS-
(Mini ramble undercut!!)
It what makes certain routes like the Spectre so fun when she joins the mess and is like “??? Is it always this loud” because like yeah. Being apart of a system in real life is really just fine tuning the noise and making your own choices, especially since the voices are usually shown at face value and when you dig deeper they all usually want the same thing: To survive.
And when you realize that it’s easier to take agency of the control you Do have as the player and therefore the vessel. They each have their own different ways and thoughts of surviving but ultimately they either just want to survive or they want to survive and end the pain of the cycle they’re forced through.
They’re just thoughts, just voices, brought forth from trauma and trying to escape, give them grace.
All this to say, being apart of a system and playing a game that involves multiple voices is really just like playing a real life simulator and is probably why I have such an easy time playing and understanding the characters in the game
#had to write this one because I couldn’t figure out why it was igging me that some folks interpret the voices +#as fully fledged people and not Voices. they’re merely shattered parts of a whole mirror#their flaws and thoughts are just that. flaws and thoughts. combine them with your own to dilute their extremities.#though this might also have to do with my mindset and play style of ‘no I’ll just succeed.’#literally just think logically because all your voices are feelings based and to make decisions you need both heart and mind#as the player you have to stop trying to input Your feeling or it’s going to conflict and get lost in the mesh of voices#see their feelings- hear them out - rationalize and you’ll win#basic system and personality disorder stuff to deal with the noise and overcrowding#honestly STP is the perfect game for systems 😭😭😭#osdd system#did osdd#osdd#osddid#actually osdd#osdd 1b#slay the princess#stp voices#stp shifting mound#shifty stp#stp analysis#slay the princess princess
55 notes
·
View notes
Text

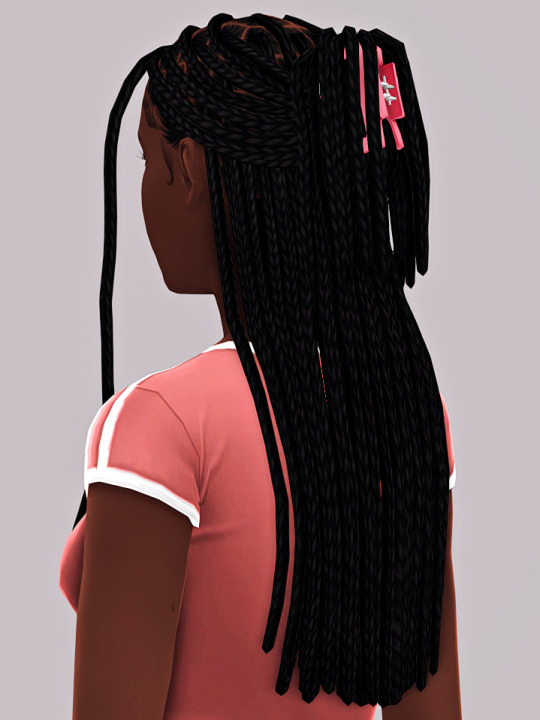
a sim before classes (and my simblr hiatus) start :)
#ts4#my sims#wip#s/o to the quarter system 🕳️🚶🏾#anyways... new braid base 😏#do we like this braid texture ??#meshing cc >>> making cc game ready
461 notes
·
View notes
Text
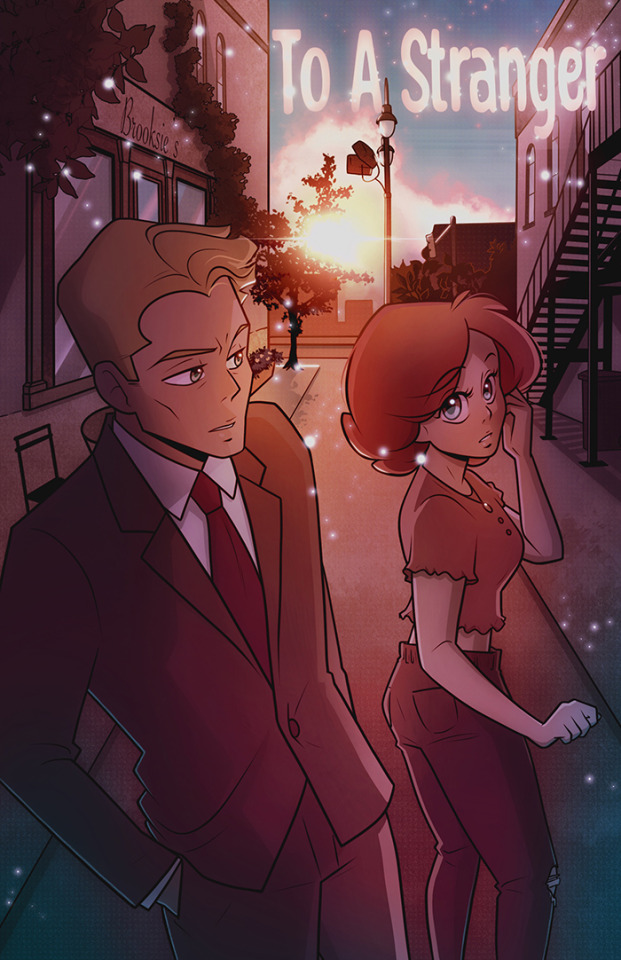

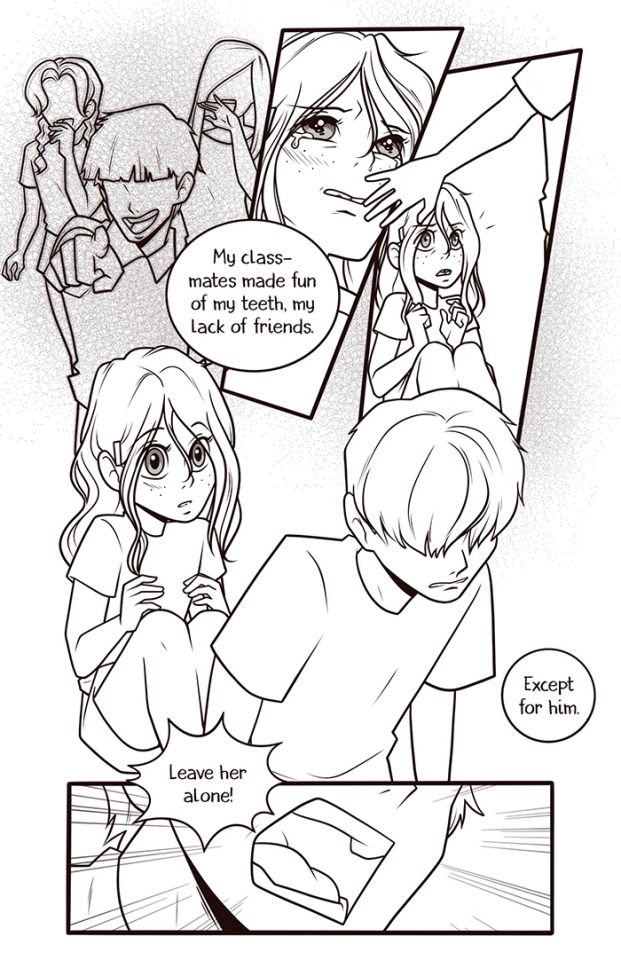
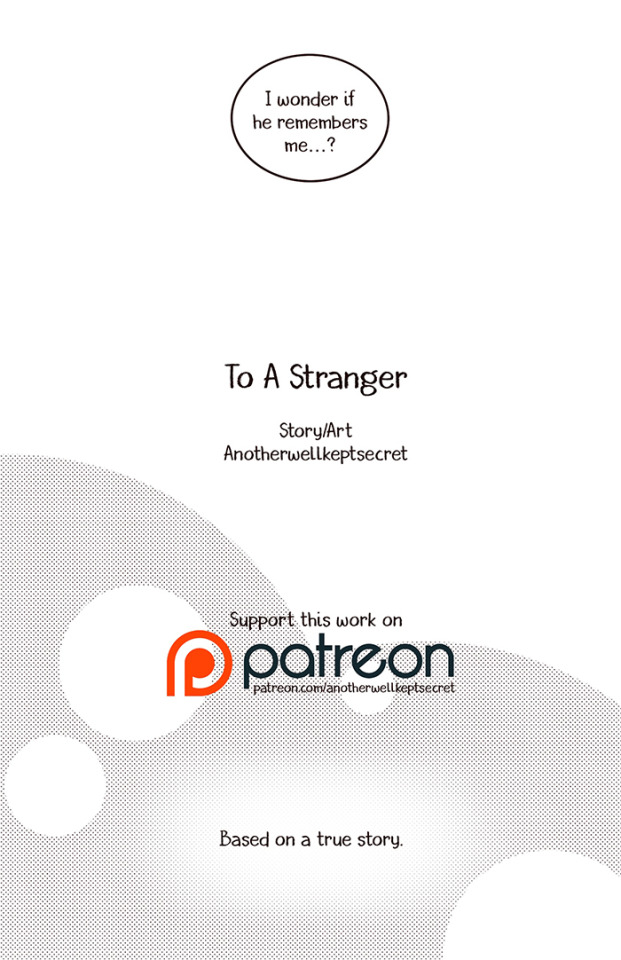

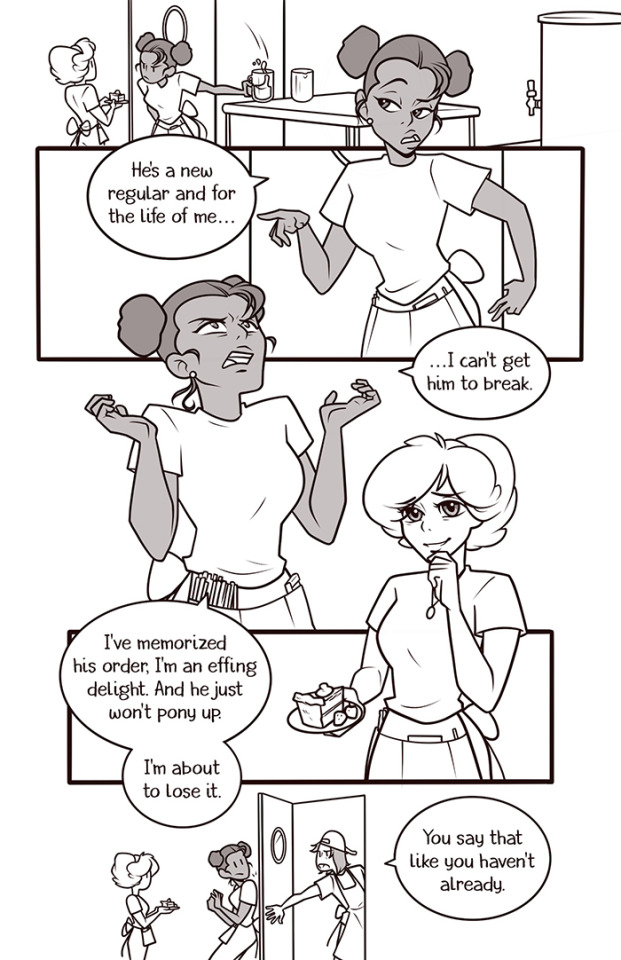


To a Stranger: Prologue & 1-5
This comic is based on a true story--about how a lonely waitress by day and artist by night crosses paths with the man who stood up for her when they were children.
This comic does not have a set update schedule. I will draw pages as time allows. Please enjoy!
#my art#to a stranger#comic#me and my guy#romance#drama#comedy#ust#sick fic#based on a true story#the tags are where you can read stuff like#i didn't work in a cute little shop#i worked at a country style barn thing#cafe is just so much cuter to draw#the other waitress is a mesh of all the waitress i've worked with#the bus boy is the same deal#zach did stand up to bullies for me but he didn't scream them down#he was just cool about it lol#i was made fun of for my teeth and lack of friends as a kid#the last time i had seen zach before bumping into him was sophomore year of college#friends to lovers#fluff#star crossed lovers
385 notes
·
View notes
Text

finally unlocked niki's photography studio, so thorn's a model now on top of all his other jobs
#dol#degrees of lewdity#dol pc#thorn the tower#his modelling outfit is based off of smsims demon dress. becuz i'm still thinkin about it.#and upset that the original mesh is messed up af so converting it is. not goin great 😔
21 notes
·
View notes
Text
In my mind the original Creativity and a Roman/Remus fusion would be entirely different sides
#cause on a base level sure they'd technically have the same job#but I think that's where the similarities would end#cause the original creativity (At least before he split) was made to coexist and work with himself#they're all his aspects of Thomas's to be in charge of at the point he was alive#and I think his general personality and demeanor would reflect that (At least before his brain and functions began splitting in half)#him being a lot and very excitable and energetic#being able to seemingly mesh all of his ideas together well whether they would have come from Roman or Remus had they already been split#meanwhile#A roman and Remus fusion wouldn't be like that#they can't mesh like that and I imagine a fusion of them would instead make it harder for Thomas to have ideas#everything being to boring or evil or good or bad or disgusting or lovey-dovey or try-hard or scary or pathetic or contrived or delusional#because they physically cannot find a common ground#not to mention instead of it being one person with conflicting ideas#it would be two people stuck in one body fighting for control and sentience#also I can't really thing of a situation where they'd both willingly fuse so that's an angst idea that's not related to my tag rant#thank you for coming to my ted talk#roman sanders#remus sanders#king creativity#creativitwins#sanders sides fusion#sanders sides
32 notes
·
View notes
Text
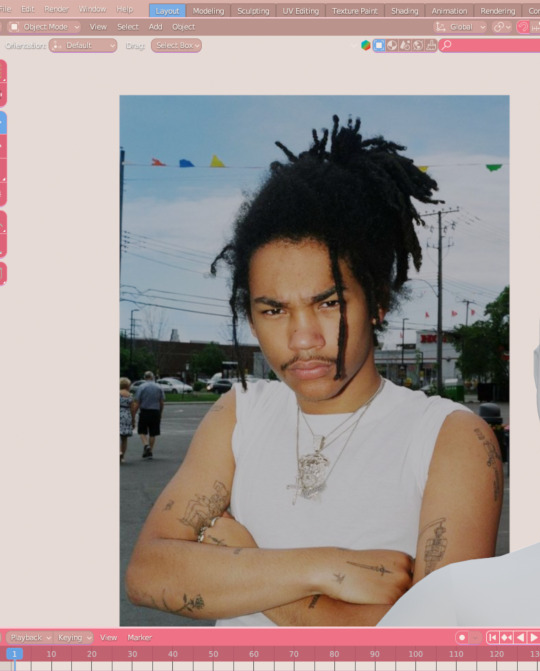
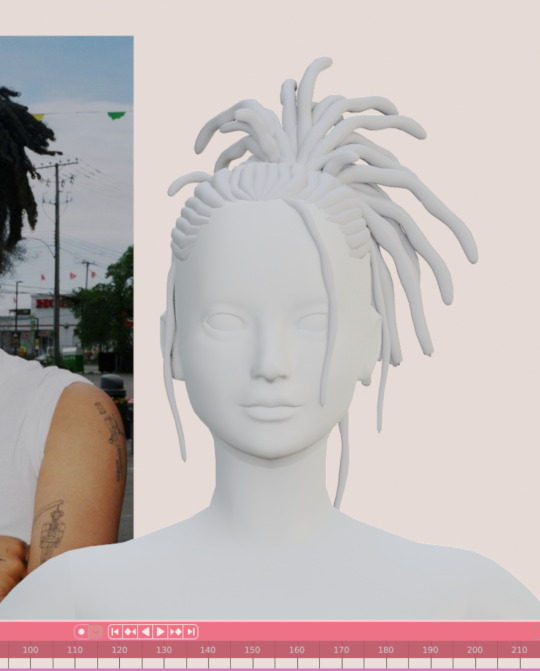
we're attempting a lil something. if all goes well then i'll put it up on kiricheu. if it doesn't go well then this never happened <3
#idk girl we trying#i just needed this hair so bad for gray#i gotta add in the pngs for the fly aways and everything one i finish the base mesh#wip
163 notes
·
View notes
Text
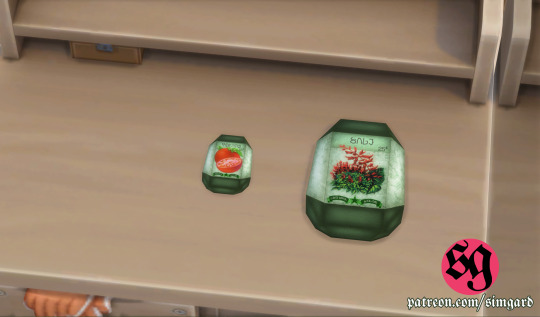
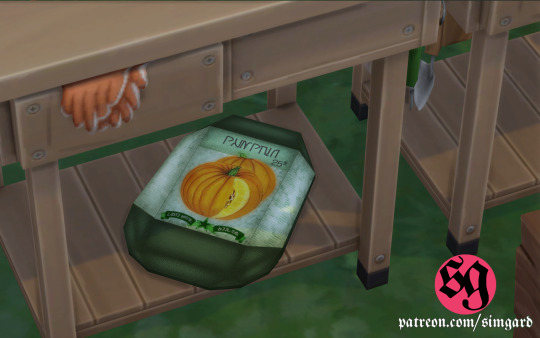
🌿 Greenhouse Haven Reloaded – Part I is almost here! ✨
I can’t believe it’s finally happening — after days (and nights!) of intense work, Part I of my Greenhouse Haven Reloaded pack is nearly ready for release! 🎉
Right now I’m polishing the final details to make sure everything feels just right:
🪴 I'm finishing a second recolor swatch for the 67 (!) custom garden markers
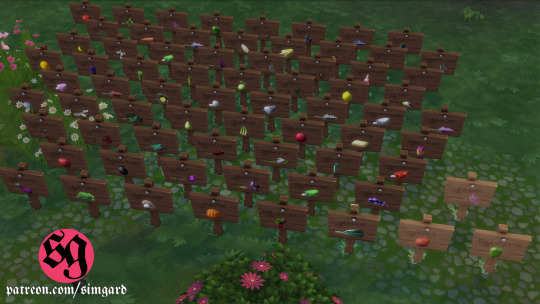
🌱 I modeled and textured my very first original mesh: a cute set of custom seed packet that I will try to make functional!
🛠️ The deco version of the flower arranging table (BGC!) has been fully optimized 📸 I have to complete the promo material and we’re good to go!
This first release ended up including 20 objects!
And this is just the beginning — the original kit will be fully reimagined and released across three more parts, each one lovingly curated, enhanced, and expanded with new swatches, added functionality (I'll try!), and hopefully extra original content. 🌼✨
💚 Hope you enjoy this little sneak peek before the full launch on my Patreon of part 1!
Stay tuned — it’s almost time! 🌸
— Simgard
#ts4#thesims4#sims 4 custom content#sims 4 cc#sims 4 build buy#ts4cc#sims 4 clutter#sims 4 gardening#sims 4 greenhouse#maxis match#ts4 maxis match#ts4 furniture#ts4 deco#sims 4 cottagecore#greenhouse haven reloaded#simgard cc#ts4 bgc#base game compatible#sims 4 preview#ts4 wip#sims 4 mod#ts4 object preview#ts4 handmade cc#sims 4 mesh edit#ts4 new mesh#thesimscommunity#ts4 garden cc
24 notes
·
View notes
Note
Hi hey gurl! I've been trying to understand something... when it comes to performance, is it vertices or polycount that really matters? I’m trying to get a clearer picture of how they affect gameplay. Hope this isn’t too random tho 😂
Hey nonny, thanks for the great question! I'm not sure if you are looking for a non-creator answer or if you maybe have some experience with meshing, but I try to cover some technical aspects that hopefully will make you understand vertices and polygons better! It's a bit of a longer journey, so grab some snacks and settle in!
Disclaimer: This is my opinion and the definitions are how I came to understand them. I believe what I say to be correct, but I am also human and may have misunderstood something, and making mistakes can happen. Thanks for understanding! TL;DR There will be calculations made on every vertex and every face present in a mesh. So the more you have of either, the worse it is for performance, but if the vertex count is much higher than the poly count, the mesh is especially unoptimized and may impact performance more than it would in an optimized state. Vertex and polygons are actually connected, literally. To understand, we need to start with the basics.
Vertices are points in a 3d space that provide the foundations of a grid-like 3d structure, known as a mesh. Connected through lines known as edges, they form a 3d shape. Three edges form a triangle, or tri for short, also known as a face or polygon. These terms can be used interchangeably, but a tri always has three vertices, whereas faces and polygons can have more than three vertices.
A polygon with 4 vertices (known as a quad) is very commonly used in 3D-modelling, because it can be used to create very neat and well-structured meshes (it is easy to make grids using rectangular shapes). A mesh that is made in a grid-like way may have the same overall shape as one made out of triangles, but the flow of the edges is different, and this plays a role during animation. Having these grid-like lines is usually better for moving and animating characters and avoiding shading issues.

Most meshes for games are thus initially made with 4-sided polygons. These quads are usually further broken down into tris if they aren't already, and three is the least amount of vertices needed to form a coplanar surface.
When the quads of the left sphere are turned into triangles, the grid structure will remain intact:

We can further break down the elements of a polygon. Let's take a simple cube. It has 6 sides, or faces, and each face has 4 vertices that make up the corners. But if we count all the vertices, we will notice that each face shares vertices with other faces. So on a simple cube, we have 6 faces and 8 vertices.

Depending on how a mesh is made though, it may have a lot of edges. You can think of those like cuts in the mesh. If we wanted to cut up the cube, we would separate each face from each other. Now we still have the same number of faces (6), but the vertices are suddenly much higher, because now, every face has its own set of 4 vertices, meaning that we have a total of 24 vertices.

In video games, polygons are usually rendered as triangles. So for our cube, that would mean that every face would be diagonally cut in half, giving us a total number of 12 faces/polygons/tris.

If we take it to the next level and separate all of these triangles from each other, the vertex count would be 36! To recount, on a mesh that is not split, it's only 8. Having these cuts (or split edges, as they are commonly called) in strategic places in the mesh where vertices are split can be important for the final look of the mesh in the Sims games.
You may have already encountered some meshes that have dark spots or shading in some parts, often at the hems. That can happen if the mesh is not split correctly in these areas. It has to do with how the normals work (they are important to how light gets reflected off the mesh).
To not go too off-topic, I won't get into detail about that here.
Ideally, a mesh is only split where it needs to be so it will look right. If there are unnecessary cuts, then the vertex count (and with it, the polygon count) goes up when it doesn't really have to be. If a mesh has a lot of these areas where a lot of faces have their own vertices, then the vertex count is much higher than on a mesh with fewer split edges. This can be a sign that a mesh is not well-optimized. So if you see a mesh that has much more vertices than polys, you may want to question it in regards to performance. CC converters will probably know that Sims 4 meshes come with a lot of these cuts that are needed for Sims 4 because of the way the CC is made (for example, pants have such a split edge cut to allow boots to look tucked-in), but those are superfluous for TS3. So I encourage every Sims 3 CC creator to remove those to save on both vertices and polygons when they are converting! The thing is, in the game, the mesh will be processed and there will be calculations made on every vertex and every face present. Each vertex is indexed, and triangles need to be drawn from the information. Other processes will need to also use the vertices for their calculations. There is more going on during rendering than simply drawing the polygons. The shaders have to calculate their effects, the textures need to be rendered and applied accordingly, filtering such as anti-aliasing will be applied, etc. So the more geometry you have in a mesh, the worse it gets in terms of performance. More geometry means that the polygons are smaller and more numerous, which will in turn affect the vertex count too.
As CC creators, we cannot address all the factors that impact performance, as we can only influence a small part, but we can try to adhere to the game's standards to minimize the performance impact as best as we can. If we wish our meshes to be more detailed than what the game's standards are, then we impact the performance more.
Instead of just cranking up detail like crazy, it is good to see if we really need it. And ask questions such as how often will the player view the item closely? If the player is usually far away from the item or it is a very small item, making it super detailed will not really do much, since the item looks the same as a low-poly item from a certain distance. We can also make compromises and maybe make an item 50% more detailed instead of 200% more detailed, providing a more detailed item while minimizing the performance impact.
This is a bit off-topic, but since I'm here already, we may refrain from using a bigger texture for a very plain piece without any notable intricate detail (like a basic T-shirt, for example), since it already looks fine with a smaller texture, but it may pay off for a highly detailed texture which looks visibly better with a bigger texture, warranting the performance impact (like a lace blouse with an intricate pattern, stitching, and small buttons).
On that note, using the texture space efficiently can also do wonders to increase detail. Use all the real estate you have on that UV map (that is a 2d representation of your 3d mesh and used to apply the texture to the mesh). Have you tried upscaling the texture yet? Okay okay, I'll stop now and get...
Back on topic: The number of polygons also matters, not just the vertex count. When a mesh has lots of smaller polygons, a lot of them are necessary to form the entire mesh. Bigger polys will not provide as much fine details, but will have less impact on hardware because fewer calculations to be made. A good mesh uses only as much detail as needed while using as few polygons as possible to still maintain functionality.
Sims clothing meshes need to animate and move well, so they need to be able to flex at the joints, and the shape must also be able to change to accommodate body sizes, thus the mesh needs the minimum amount of geometry to achieve this and still look decent, which is a sweet spot the developers have to find to craft meshes that perform well while looking reasonably good.
A good habit for creators looking to make meshes for the Sims games is to look at similar meshes in the game and study them (so for TS3, check the original TS3 game meshes, for TS4, check the original TS4 game meshes). Check how many polys they use and how good the topology (structure) of the mesh is.
For example, how many rows of edges do they usually have, and what sizes are the polys usually? How many vertices are in one round of edge loops, for example for the arms? How are the different mesh parts connected to each other, where are split edges used? Then imitate that.
The professionals who made these original meshes knew what they were doing, and they optimized them to be gameplay-friendly, so if in doubt, copy what they do.
Game meshes are usually especially optimized and it is very much game-dependent how they are structured, so a mesh from a different game can look totally different. CC Creators looking to optimize performance in their meshes should try to match the original game's mesh in terms of structure and polycounts. This will also ensure they animate well!
If you made it this far: well done, thanks for bearing with me! I hope you feel more knowledgeable and ready to apply what you've learned to your own meshes or when selecting CC for your favorite Sims game.
#sims 3#reply#sims 4#sims meshing resource#ts3 meshing#sims polycounts#Sims CC creation#meshing theory#tutorial#ts3 tutorial#ts4 tutorial#my best tutorials are always based on asks#why do I always forget which tags I use for tutorials
36 notes
·
View notes
Text
Would transformers be able to go to catholic heaven?
#cookie talks#dumb poll lmao#i personally don't think catholicism can mesh with alien life based on its theology#but this is based off my own rememberance of catholic middle and high school and i am absolutely NOT catholic sooooo#maccadam
26 notes
·
View notes